
Tearing out a damaged fiberglass bathtub is an absolute last resort.
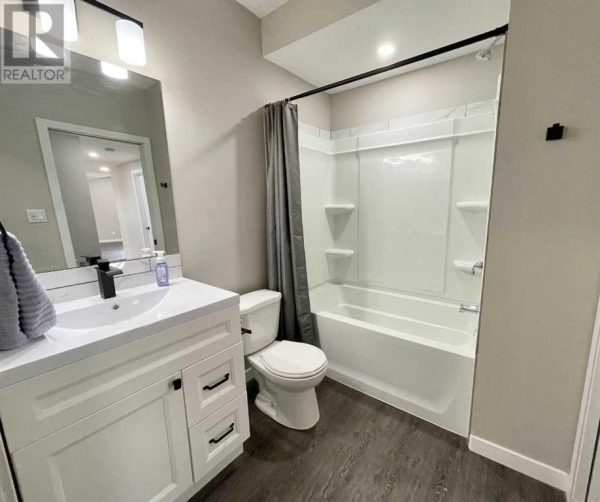
Once you yank a tub out, you aren’t just paying for a new piece of acrylic or fiberglass. You’re bringing in a plumber, paying drywallers, mudding, taping, replacing rotted subfloors, and rebuilding your surround. A job that should have cost under $100 easily spirals into a $2,000+ nightmare.
Most homeowners facing a gouge or crack assume their only choices are a cheap $25 Amazon liquid repair kit or a full tear-out. There is a third option: the Red Seal trade trick. By using automotive body filler (Bondo) for structural filling and dedicated tub-and-tile aerosol paint for feathering the finish, you get a durable, watertight, professional repair that won’t break the bank.
1. Decision Matrix: Can Your Tub Be Saved?
Before grabbing your tools, verify whether your tub can be safely repaired or if structural failure requires full replacement:
| Condition / Symptom | Repairable with Bondo? | Recommended Action |
| Surface Gouges & Scratches | YES | Easy fix. Scuff, fill with Bondo, and spray with Tub & Tile paint. |
| Hairline Floor Cracks | YES | Drill relief holes at ends of crack, scuff heavy, fill, and feather. |
| Large Flex Cracks (Tub Sinks Under Foot) | NO / CAUTION | Structural sub-frame lacks support. Fill won’t hold long-term unless expanding foam support is injected underneath first. |
| Spiderwebbing / Gelcoat Creasing | YES | Light surface sanding, Bondo skim, and aerosol feathering will restore the finish. |
| Full Hole (Punch-through to Subfloor) | NO | Replace the unit—the risk of water damage is too high. |
2. The Snippet Killer: How to Fix a Fiberglass Bathtub
How do you repair a cracked or gouged fiberglass bathtub on a budget?
To repair a fiberglass bathtub, clean the area with rubbing alcohol, then heavy-scrub it using 30–50 grit sandpaper to create a mechanical bond. If repairing a hairline crack, drill 1/8-inch relief holes at each end to stop stress fractures. Mix automotive body filler (Bondo) with its hardener and apply it tightly to the gouge in two thin stages. Once cured, sand flat working from 80-grit up to 120-grit using flexible foam sanding blocks. Clean away all dust, then feather the finish using specialized Tub & Tile aerosol spray paint applied in quick, light layers. Allow the paint to dry completely and cure for 72 hours before exposing it to water.
3. The “Journeyman’s Kit” (Essential Tools & Materials)
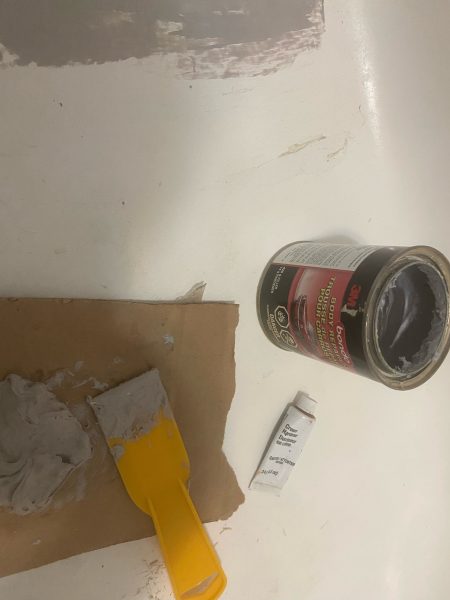
Don’t guess at the hardware store aisle. Here are the exact materials and safety gear required to pull off this repair cleanly:
🛠️ The Contractor-Grade Repair Setup
- Structural Filler: Bondo Automotive Body Filler (Water-resistant, high-strength, fast-curing).
- Finish Coating: Rust-Oleum Specialty Tub & Tile Refreshing Spray Paint (Formulated explicitly for wet environments; resists yellowing).
- Substrate Prep: 99% Isopropyl Rubbing Alcohol (Leaves zero residue/oils behind).
- Abrasives: 30–50 grit sandpaper (for initial gouging/roughing) and flexible Foam Sanding Blocks (80-grit to 120-grit).
- Drill Bit (For Cracks): 1/8-inch drill bit (for drilling stop-relief holes at crack tips).
- Safety Equipment: Half-mask respirator with organic vapor cartridges, safety glasses, and a portable box fan/exhaust fan.
4. The Hidden Threat: Why “Just Silicone It” Causes Subfloor Disaster
Slapping 100% silicone caulk over a crack on a bathtub floor might hold for a week—or it might seem fine for a year. The problem is that silicone flexing under foot traffic creates a slow, invisible micro-leak.
[ Water Seeps Through Crack ]
          │
          ▼
[ Trapped Moisture Under Tub Unit ]
          │
          ▼
[ Subfloor Rot & Mold Escalation ]
          │
          ▼
[ Structural Framing / I-Joist Failure ]
When water leaks past the tub floor or door sill, it saturates the OSB or plywood subfloor beneath the unit. Because the space under a tub is dark and unventilated, the moisture stays trapped for months or years and slowly rots out your subfloor and worse your joists.
The Cost of Ignoring the Leak
| Repair Method | Direct Cost | Labour Required | Risk of Subfloor Damage |
| Bondo & Tub/Tile Aerosol Repair | $35 – $60 | 2–3 Hours (DIY) | Zero (When sealed properly) |
| Siliconing Over the Crack | $10 | 15 Minutes | Extremely High (Slow-rot risk) |
| Full Tub Removal & Subfloor Build | $2,000 – $4,500+ | 3–5 Days (Plumber + Carpenter + Drywaller) | Severe structural risk if joists rot |
Real Jobsite Reality: I recently pulled out a shower unit where water had been slowly trickling over the door sill for 15 years. The subfloor underneath was completely rotted out. The homeowners were lucky—the rot was millimeters away from eating into the engineered I-joists. If they had waited another few months, the joists would have collapsed, turning a basic job into an astronomical structural repair bill.
5. Step-by-Step: The Two-Stage Bondo Repair Method
Step 1: Prep the Substrate & Drill Stop Holes
- Clean the entire repair area with rubbing alcohol. Never use household cleaners that leave soapy films or degreasers that contain oils.
- The Journeyman Relief Trick: If you are repairing a hairline crack, take a 1/8-inch drill bit and drill a small hole directly through the fiberglass at the exact tips of both ends of the crack. This relieves the tension point and stops the crack from expanding under your new filler when walked on.
- Take 30 to 50-grit sandpaper and aggressively rough up the gouge/crack and the surrounding 1 inch of fiberglass. Bondo needs a heavy mechanical key to bite into.
Step 2: The First Fill (Get It Flat)
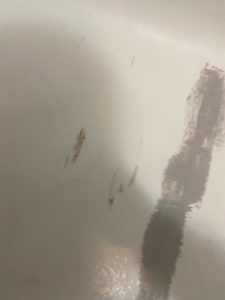
Working with Bondo means you are on the clock once the cream hardener is mixed into the resin base.
- Mix a golf-ball-sized portion of Bondo with the manufacturer-recommended amount of hardener on a disposable surface.
- Press the filler tightly into the gouge/crack (and into the drilled relief holes) using a plastic putty knife.
- Stage 1 Goal: Focus purely on filling the depth of the hole so it sits flat with the tub floor. Do not worry about matching anti-slip textures on this pass.
- Let it cure completely (usually 15 to 20 minutes).
Step 3: Sanding and Sculpting (The Art Form)
Break out the artist in you for this step. Fill the gap first then come in and texture to match.
- Once hardened, use an 80-grit foam sanding block to knock down any high spots. Foam blocks are vital here because they flex around the natural curves of the tub floor without gouging deeper into the surrounding gelcoat.
- Switch to a 120-grit foam block to smooth out the edges.
- Stage 2 (For Anti-Slip Textured Floors): If your tub bottom has a textured pattern, mix a tiny second batch of Bondo. Dapple or stipple the surface gently using the tip of your putty knife or a stiff bristle to mimic the surrounding texture. Let it harden and lightly scuff with 120-grit.
Step 4: Feathering the Spray Paint & Mandatory Cure Time
To make the repair completely vanish, you must feather the paint rather than spraying one thick, heavy spot.
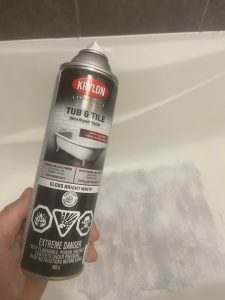
[ Layer 1: Spot-coat Bondo only ] ──> [ Layer 2: Lightly overlap edge ] ──> [ Layer 3: Mist entire floor section ]
- Safety First: Turn on the bathroom exhaust fan, open any windows, set up a portable fan, and wear your respirator and safety glasses.
- Shake your dedicated Tub & Tile aerosol spray paint thoroughly.
- Apply very light, quick passes directly over the sanded Bondo area.
- Allow the paint to flash off (dry) for a few minutes.
- Apply the next light layer, extending the spray pattern slightly further out onto the original tub surface each time.
- Continue misting and feathering outward until the patch visually disappears into the surrounding tub bottom.
⚠️ CRITICAL PRO NOTE: THE 72-HOUR CURE RULE
While Bondo cures in 20 minutes and Tub & Tile aerosol feels dry to the touch in under an hour, you MUST wait a full 72 hours (3 days) before turning on the shower or filling the tub. Exposing fresh tub paint to hot, soapy water early will cause the paint layer to blister, soften, and peel right off.
6. What to Do If the Paint Job Looks Rough (The Backup Trick)
If you are tackling this as a DIY project and realize halfway through that you don’t quite have the artistic touch for feathering paint, don’t panic.
The primary goal of this entire job is functional protection: stopping water from destroying your subfloor and preventing a full tub replacement.
- The DIY Fallback: If your paint match isn’t perfect, head down to your local store and buy a quality, stylish rubber bathmat. Place it directly over the repaired section.
- Your floor remains 100% watertight, your subfloor is protected from rot, and you can comfortably ride out the repair until you’re genuinely ready to renovate the entire bathroom on your own terms.
Quick Pre-Repair Checklist
- [ ] Is the tub floor thoroughly dry and cleaned with rubbing alcohol?
- [ ] Did you drill 1/8-inch relief holes at both ends of hairline cracks?
- [ ] Did you scuff the gouge with 30–50 grit sandpaper?
- [ ] Do you have a respirator mask and proper ventilation set up?
- [ ] Are you using foam sanding blocks instead of hard wood sanding blocks?
- [ ] Is your paint specifically labeled Tub & Tile (not standard interior aerosol)?
- [ ] Have you marked a 72-hour drying hold on your calendar before taking the next shower?